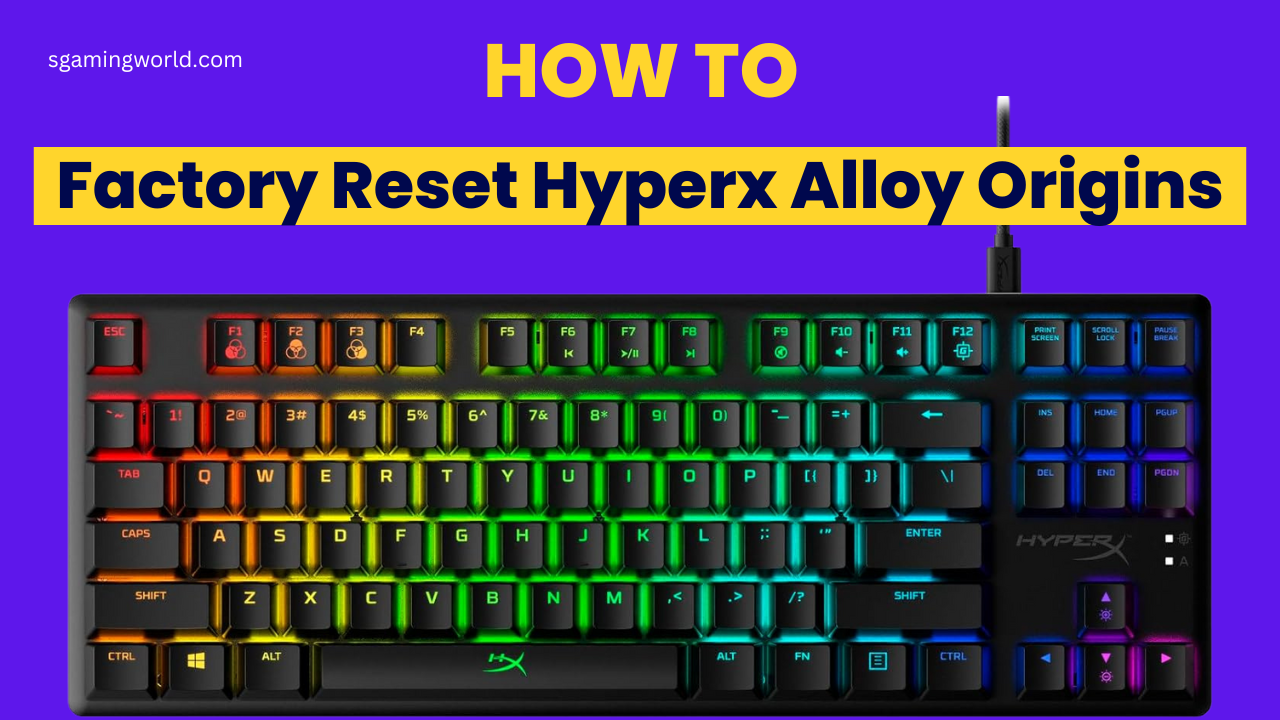
The HyperX Alloy Origins is a popular gaming keyboard, and the biggest reasons for its popularity are its good looks and performance. However, even the best keyboards can create problems. Sometimes, a malfunction occurs within the HyperX Alloy Origins keyboard settings. We need to reset the keyboard to fix it. I know, you need to reset your keyboard; that’s why you have come to read this article. In this article, I will guide you on how to factory reset your HyperX Alloy Origins keyboard.
To reset the keyboard properly, follow all the steps I provide carefully. If any settings on the keyboard are incorrect, resetting it will fix all the problems.
How to Perform a Factory Reset HyperX Alloy Origins
Resetting your HyperX Alloy Origins keyboard is straightforward. Follow these steps to restore it to its original factory settings.
- Unplug Your Keyboard: Disconnect the HyperX Alloy Origins keyboard from your computer.
- Locate Key Combinations: Identify the following keys on your keyboard:
Left Alt key
Spacebar
Fn key

- Press and Hold Keys: Simultaneously press and hold the Left Alt, Spacebar, and Fn keys together.
- Maintain Pressure: Continue holding down all three keys for approximately 5 seconds.
- Confirm Reset: The keyboard’s lights should begin to flash, indicating that the reset process has started.
- Release Keys: Once the lights flash, you can release the three keys.
- Reconnect Keyboard: Plug the keyboard back into your computer.
Remember: The specific appearance of your keyboard and the exact placement of keys might vary.
Common Reasons Why You Need to Perform a Factory Reset HyperX Alloy Origins
HyperX Alloy Origins users know, this keyboard is loved for its high performance and boost features like RGB lightning customizable, macros, and durable build quality. Firmware and software play the most crucial role in enhancing the functions of the keyboard.
- Firmware is internal software that controls the keyboard’s hardware and keeps it updated. It also supports new features to run the keyboard smoothly.
- Software programs allow you to customize your keyboard’s settings.
Common Causes
- Sometimes unresponsive keys, require a factory reset.
- If you have made a lot of custom changes to your keyboard, you may have to reset it to bring it back to its original settings.
- A situation in which it may be necessary to reset the keyword keyboard is when you hand over your keyboard to someone else. Transfer your keyboard to someone else by resetting and removing your keyboard’s settings.
- Sometimes Software Conflicts Updating software also requires a factory reset.
Also Read: changing the colors of your gaming mouse
How to Reset Hyperx Alloy Elite 2 keyboard

You can reset it easily. To reset your HyperX Alloy Elite 2 keyboard to its factory default settings, follow these steps:
- Unplug or disconnect the Elite 2 keyboard from your computer.
- Three function keys are located in the top left corner of the keyboard (brightness, profile, and game mode) press and hold them simultaneously for about 5 seconds.
- Release the keys. The keyboard’s LEDs will flash to indicate a successful reset.
- Plug the keyboard back in and wait for it.
Note: This reset will restore all keyboard settings to their default values, including lighting effects, macros, and profiles.
HyperX Alloy Origins Presets Not Working
-
Check NGENUITY Software:
- Ensure NGENUITY is up-to-date. Outdated software can cause compatibility issues.
- Verify that your presets are saved in the software. Sometimes, accidental deletions or overwrites can occur.
- Try creating new presets to see if the issue persists.
- Close and reopen INGENUITY to refresh the software.
-
Keyboard Reset:
- A factory reset might resolve software-related issues. Refer to the manual or online guides for specific instructions on resetting your HyperX Alloy Origins.
-
USB Port:
- Sometimes, port-related issues can interfere with device functionality.
-
Software Conflicts:
- Other software might conflict with INGENUITY. Temporarily disable other RGB software or conflicting applications to isolate the issue.
-
Reinstall INGENUITY:
- As a last resort, uninstall and reinstall NGENUITY. This can help resolve software-related problems.
Additional Tips:
- Double-check the keyboard shortcuts for switching between presets.
- Make sure your keyboard is physically connected correctly.
- Try creating simpler presets to test if the issue is related to complex configurations.
How to turn on the lights on your HyperX keyboard
Here’s how to turn on the lights on your HyperX keyboard:
- Plug your HyperX keyboard.
- Download the HyperX NGENUITY software from the HyperX website.
- Install the HyperX NGENUITY software
- open the HyperX NGENUITY software once it’s installed.
- From the software, select your HyperX keyboard from the list of connected devices.
- Navigate to the lighting settings. You can choose from various lighting effects and customize the colors to your preference.
- Once you’ve customized the lighting to your liking, click “Apply” to activate the lights on your keyboard.
Final Thoughts
Resetting your HyperX Alloy Origins keyboard is a straightforward process that can effectively resolve a variety of issues. Following the simple steps outlined in this guide, you can restore your keyboard to its factory default settings and troubleshoot problems related to unresponsive keys, software conflicts, or unwanted customizations.
While resetting your keyboard will erase all custom settings, it is often the most efficient solution for restoring optimal performance. Remember to back up any essential profiles or macros before resetting.
If you encounter persistent issues after resetting your keyboard, consider updating the INGENUITY software, checking for software conflicts, or trying different USB ports. By systematically addressing these potential causes, you can further enhance your HyperX Alloy Origins keyboard’s functionality and enjoy an improved gaming experience.
Also Read: controller triangle button is not working


I must thank you for the efforts you’ve put in penning this blog. I really hope to see the same high-grade content by you later on as well. In fact, your creative writing abilities has motivated me to get my own, personal site now 😉
I really like reading a post that will make men and women think. Also, thanks for permitting me to comment.
I’m extremely pleased to uncover this great site. I wanted to thank you for ones time for this wonderful read!! I definitely really liked every little bit of it and I have you book-marked to check out new things on your blog.
Saved as a favorite, I really like your website!
I have to thank you for the efforts you have put in writing this blog. I’m hoping to check out the same high-grade content by you in the future as well. In truth, your creative writing abilities has encouraged me to get my own website now 😉
Thank you for your very good information and respond to you. used car in san jose
An intriguing discussion is worth comment. I believe that you ought to write more on this topic, it may not be a taboo subject but generally people don’t talk about these subjects. To the next! All the best!