Exploring your Xbox One controller can be exciting for tech lovers and DIY fans. This article is all about how to open the Xbox One X controller. You’ll also learn about controller cleaning, replacing parts, or seeing what’s inside.
We’ll take you through each step carefully. By the end, you’ll know your controller inside out. You’ll be ready to fix or change it as needed.
What is Taking apart the Xbox One Controller

Having an Xbox Series X controller is a big deal. Sometimes, you might need to take it apart for reasons like troubleshooting, maintenance, or customizing parts. Knowing the reasons to take it apart and the tools and safety steps needed makes the process easier and safer.
Why Take Apart Your Xbox Controller?
There are many good reasons to open your Xbox One X Controller, such as:
- Fixing hardware or functionality problems
- Doing regular cleaning and upkeep to make it last longer
- Changing the look or how it works by swapping or adding parts
- Getting to know the inner parts of your gaming controller
Before you start taking apart your controller, make sure you follow safety steps and have the right tools. This makes the process go smoothly and keeps you and your controller safe from harm.
| Safety Precautions | Tools Required |
|
|
With the right safety steps and tools ready, you can safely take apart your Xbox Series X controller.
How to Open XBOX One X
Taking apart your Xbox Series X controller can be rewarding. It lets you see how it works and do maintenance or customizations. This guide to taking apart the Xbox controller will help you do it safely and effectively.
First, gather your tools. With everything ready, follow these steps for the Xbox series x controller teardown process:
- Remove any batteries or cables from the Xbox controller.
- Look for small screws around the controller’s outer shell and unscrew them with the help of a Phillips-head screwdriver.
- Take out the battery pack and other parts like the rumble motors to see the inside.
- Check the parts for wear or damage, and clean the inside with a soft, dry cloth.
- Put the controller back together in the reverse order.
Always be careful with the parts and take your time for a successful reassembly.

| Tool | Purpose |
| Phillips-head Screwdriver | Removing and tightening screws on the controller’s outer shell |
| Spudger or Plastic Pry Tool | Carefully separating the front and back plates of the controller |
| Soft, Dry Cloth | Cleaning the interior of the controller |
Removing the Controller’s Outer Shell
Taking apart your Xbox controller starts with removing its outer shell. This step needs patience and care to avoid harming the inside parts. We’ll guide you through how to remove the Xbox Series X controller’s outer shell and separate the front and back plates.
How to Separate the Front and Back Plates of the Controller
- First, remove the screws.
- Pry the front and back plates apart, starting from the bottom.
- Carefully lift the front plate away from the back plate.
- Make sure any cables or connectors that may still not be attached between the two plates.
- Now that the front and back plates are apart.
This is how you get to the controller’s internal parts.
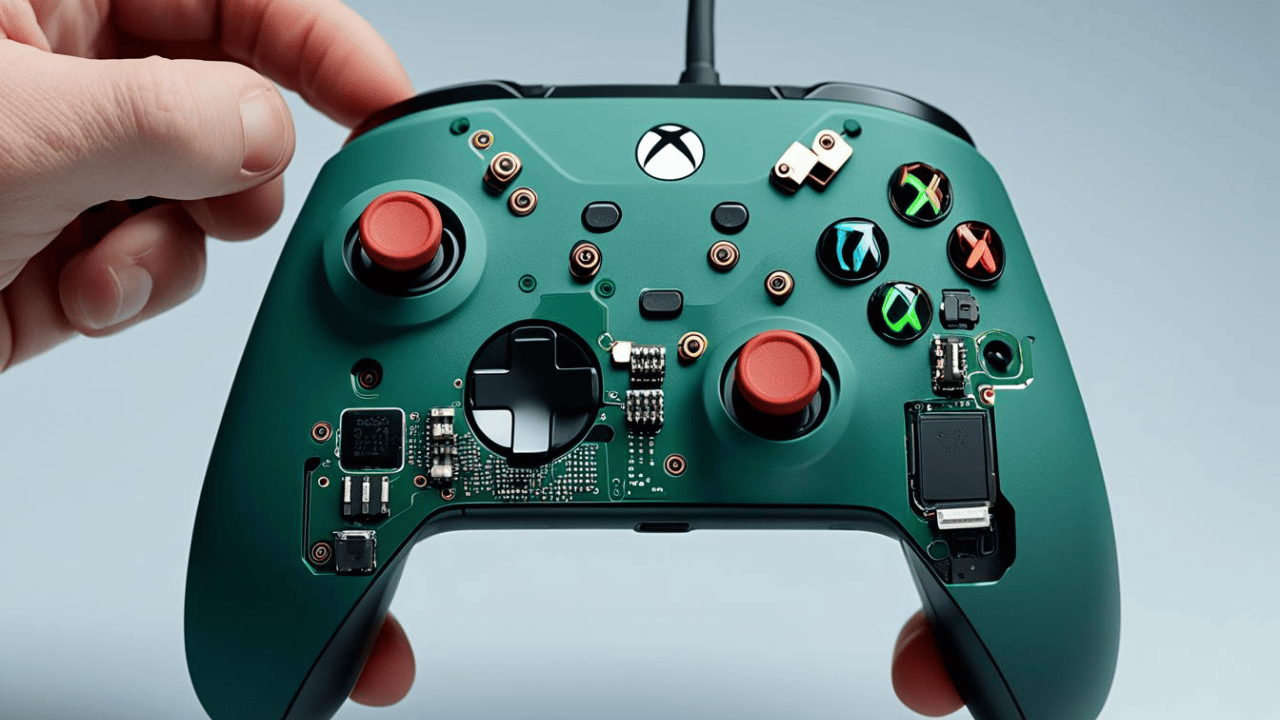
Accessing the Internal Components
After removing the outer shell of your Xbox, it’s time to look internal parts. These parts are delicate and must be removed correctly. Let’s go through the steps to get to the internal components, take out the battery pack, and remove the rumble motors.
Disconnecting the Battery Pack
The battery pack is key to powering your Xbox Series X controller. Here’s how to safely remove it:
- Find the battery pack connector at the bottom of the controller’s inside.
- Carefully take the battery pack off the main circuit board without using too much force.
- After removing the battery pack, put it in a safe place. Make sure you don’t lose any small parts or connectors.
Detaching the Rumble Motors
The rumble motors give you vibration feedback during games. Here’s how to take them out:
- Look for the rumble motors on both sides of the controller’s inside.
- Disconnect the rumble motor cables from the main circuit board
- Slowly pull the rumble motors out of their slots.
Always be gentle with the parts to prevent damage or problems.
Inspecting the Controller
Start by looking at the inside parts of the controller. Check for any wear, damage, or a lot of dust. Focus on these areas:
- Buttons and Triggers: Make sure they work right and aren’t stuck or worn out.
- Analog Sticks: They should turn smoothly and not have any drift or resistance.
- Circuit Board: Look for any damage or corrosion on the board.
- Rumble Motors: Make sure they’re attached well and not blocked.
Cleaning the Controller
- After checking everything, now clean the inside.
- Use a soft, dry brush or compressed air to clean off dust or debris from the circuit board. Don’t use liquids or wet cleaners.
- Put the controller back together carefully, making sure everything fits right.
Reassembling the Xbox One X Controller
Follow these steps to make sure your controller is ready to use.
- Start by reconnecting the rumble motors. Make sure they fit well and screw them in place.
- Put the battery pack back on, ensuring it’s securely connected inside the controller.
- Line up the front and back parts of the controller, checking everything is in its spot.
- Press the front and back parts together carefully, avoiding any cables or wires.
- Put the screws back in to hold the parts together. Don’t overtighten them.
- Check the controller for any gaps or parts that aren’t aligned right. Fix them if needed for a smooth fit.
- After reassembling, test the controller.
How to Open an Xbox One X to Clean it?
- Remove the top cover by using a Torx 10 screwdriver to remove screws. Carefully lift off the cover.
- Clean carefully: Use compressed air to remove dust from fans and heaters.
- Reassemble: Carefully replace the top cover and screws.
How to Open an Xbox One Console
Opening an Xbox One console can be tricky and might void your warranty. It’s best to watch a video tutorial for specific steps Carefully remove screws on the top and sides. Gently lift off the top cover. Be cautious when handling internal parts. Clean carefully with compressed air and a soft brush. Reassemble everything and replace the top cover securely.
Conclusion
In this article, you have to learn about disassembling the Xbox controller and its inner workings. Now, you’re ready to keep your controller running smoothly.
Remember, always work in a clean, bright area when taking apart your controller.
This guide has helped you understand your controller better. Now, you can take care of it yourself. You’re set to handle any future problems, keeping your gaming fun and uninterrupted.